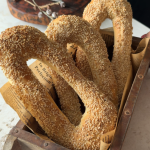
Jerusalem Bagels
Soft and chewy Jerusalem Bagels coated in toasted sesame seeds and baked until golden brown. A traditional Middle Eastern bread recipe perfect for breakfast, sandwiches, or serving with dips.
Ingredients
For Dough:
- 720 g All-purpose flour
- 540 g Lukewarm milk (35–40°C)
- 9 g Instant yeast (3 tsp)
- 12 g Sugar
- 12 g Salt
- 40 g Olive oil
For Topping:
- 180–240 g Sesame seeds
- 60 g Milk (for brushing)
Instructions
- In a large mixing bowl, combine the flour, instant yeast, sugar, and salt. Mix thoroughly so all the dry ingredients are evenly distributed for a consistent dough.
- Pour in the lukewarm milk along with the olive oil. Stir everything together until a soft, shaggy dough begins to come together.
- Transfer the dough onto a clean surface and knead for about 8–10 minutes. Continue kneading until the dough becomes smooth, elastic, and slightly tacky but not sticky or dry.
- Place the kneaded dough into a lightly greased bowl, cover it with a clean cloth or cling film, and allow it to rise in a warm place for about 1 hour, or until it doubles in size.
- Once the dough has risen, gently punch it down and divide it into 5–6 equal portions. Roll each portion into a long rope, approximately 50–60 cm in length.
- Shape each rope into a large oval ring, keeping them loose and airy rather than tightly closed circles to achieve the traditional Jerusalem bagel shape.
- Lightly brush each shaped bagel with milk, ensuring the surface is slightly moist so the sesame seeds adhere well.
- Press each bagel firmly into sesame seeds, coating them generously on all sides for maximum flavor and texture.
- Arrange the coated bagels on a lined baking tray and let them rest for another 20–30 minutes until they appear slightly puffy.
- Preheat the oven to 220°C and bake the Jerusalem bagels for 18–22 minutes, or until they turn deep golden brown and the sesame seeds are toasted.
- Allow them to cool slightly after baking, then serve warm with your choice of spreads, dips, or fillings for the best texture and flavor.